
Since I am currently working on the next tutorial entitled Creating Digital Cinema, I decided to come up with a quick and useful tutorial in the mean time. This is for all you who filmed something hand-held either because you didn't have the time to set up a dolly or simply couldn't afford it, and crossed your fingers hoping it wouldn't turn out too bad...
The techniques in this lesson can be performed both automatically with an expression and manually with keyframes.
Here's the description from Creative Cow:
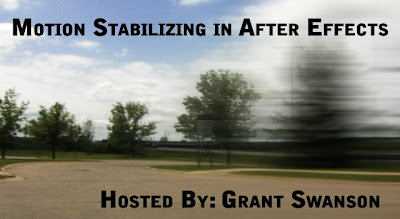
In this video tutorial, Creative Cow contributing editor Grant Swanson will explain how to use the After Effects Motion Tracker to remove unwanted jitter and movement while still retaining the original motion of the sequence through the use of an expression or manual keyframes.
UPDATE: If you decide to set keyframes manually, try selecting them all and hitting "F9" to smooth the motion even further. You may or may not like the way this looks, but give it a try.
14 comments:
Hi. Thanx for a great tutorial. I'm really looking forward to your next. But I just wonder: Wouldn't it be better if you, instead of scaling up the picture underneath, blured out the edges, and used levels on the alpha channel to make it opaque? Haven't tried it (my AE isn't working), but I'm just thinking.
Michael,
Thanks for the compliment.
I'm not quite understanding what you mean by that. Are you talking about making the bottom layer or the top layer opaque?...right now they're both 100% opaque.
The reason I blurred out the edges was to just make the hard line that reveals the bottom layer less noticeable.
Let me know,
-Grant
What I meant was that you can fill the gaps without scaling the bottom layer, but instead smudge out its edges with a blur. But since the blur will blend the edges with the transparent (black) background, it will appear darker, something you can fix in levels. That way the overlap of the two layers won't become as apparent as when you merely scale the bottom layer.
But still, I don't know if this works.
Hope I explained it at least a bit better now.
Yes that would work, but the only problem with it is that in order for the image to completely fill the gaps (depending on how large the gaps are) the blur amount would have to be set fairly high (obviously with Repeat Edge Pixels turned off), creating a very soft image in the background, compared to the very sharp image in the foreground.
Of course none of it really matters since it's all outside of the action safe guides anyway.
-Grant
why set keyframes for position? why not set 1 keyframe and the just copy paste-it? why drag the footage?
Because that wouldn't work; the anchor point that is animated by the tracker controls moves around the layer, not the composition, it stays in the exact same place in the composition - dead center. When you adjust the position manually, you're moving the anchor point around in the composition instead of the layer.
So if you just copied and pasted the first position keyframe, or any position keyframe for that matter, nothing would happen, since the anchor point is staying in the same place in the composition - dead center.
It sounds a little confusing, but it makes sense when you think about the relationship between the anchor point and position.
That's why you have to drag the footage, so that you physically move the anchor point to new place in the composition.
Of course you can skip all this and just use the expression :-)
-Grant
Grant, Great tutorial, you really helped me with stabilizing my footage. The position expression you used worked exceptionally well. What expression would you use if you used the rotation button as well? Keep up the great work.
Eddie -
Thanks for the compliment.
If you turn the layer into a 3D layer, you can manipulate the Orientation on the Z-axis.
You can also apply the effect called "Transform" from the Distort menu, and animate the rotation values there.
-Grant
Great tutorial, I just built a dolly, and I was looking for some way to get rid of minor problems while keeping the dolly shot, this should help solve that problem.
Looking forward to the film styles tutorial.
Grant,
Thanks for the suggestions. Is it possible to use an expression for the rotation, and if so do you know what that would be?
Thanks Again,
eddie
Hey Grant, Great tutorials. I just have a question cause I'm new to After Effects. In this tutorial by someone else (http://library.creativecow.net/articles/stern_eran/Invisible_Cape.php), He said he used some kind of alpha channel thing to separate the subject from the background. How do I do that? Are there any tutorials you could recommend for me to learn from? If not, could you make one for me? =D. Is it also possible to extract the subject from a video? Thanks in advance.
oops, last few letters are Invisible_Cape.php
Eddie -
To use an expression for the rotation you'll need to take the keyframes that were already applied to the rotation property and smooth those directly, so...try applying this to the rotation property by alt+clicking on the stopwatch (don't turn off the stop watch first though):
rotation-rotation.smooth(width=.75,samples=9)
To make it more smooth increase the width.
Ken -
It looks to me like the character was just shot on a green screen, which was then keyed out. You can always render out the video with an alpha channel, in the render options just choose to render "RGB+" which will include the alpha channel if there is one (you'll have to choose straight or pre-multiplied depending on your case), obviously only choose this though if there is an alpha channel or you will waste rendering times, playability, and file size.
I just searched CreativeCow.net and found these two tutorials on the topic:
http://library.creativecow.net/
articles/rabinowitz_aharon/
workflow_1.php
http://library.creativecow.net/
articles/rabinowitz_aharon/
straight_vs_premult.php
Hope this helps!
-Grant
Grant,
That did it.
Thanks for the help.
eddie
Post a Comment